Por 9.99€ al mes tendrás acceso completo a todos los cursos. Sin matrícula ni permanencia.
Hola Mundo con el canvas de Javascript
<canvas id="canvas" width="400px" height="400px" style="border:2px solid black" />
<script>
	var c = document.getElementById("canvas");
	var ctx = c.getContext("2d");

	ctx.font = "40px Arial";
	ctx.fillText(“Hola mundo”, 50, 50);
</script>
Fill, stroke
//Rectángulo sin borde
ctx.fillStyle = "red";
ctx.fillRect(10, 10, 50, 50);

//Rectángulo azul (sólo borde)
ctx.lineWidth = 5;
ctx.strokeStyle = "rgba(0, 0, 255, 1)";
ctx.strokeRect(70, 70, 140, 140);

//Borra la pantalla entera
//ctx.clearRect(0,0,400,400);
Salvar el contexto al modificar el canvas con Javascript
//Rectángulo sin borde
ctx.fillStyle = "red";
ctx.fillRect(10, 10, 50, 50);
ctx.save();

ctx.fillStyle = "blue";
ctx.fillRect(60, 60, 150, 150);

//Pinto un cuadrado rojo. Si comento la siguiente línea el rectángulo se pinta en azul
ctx.restore();
ctx.fillRect(160, 160, 250, 250);
Primitivas del Canvas de JavaScript
Rectángulo
//Rectángulo con borde
ctx.rect(40, 100, 100, 200);
ctx.fillStyle = "#8ED6FF";
ctx.fill();
ctx.lineWidth = 5;
ctx.strokeStyle = "black";
ctx.stroke();
Arco
ctx.fillStyle = "green";
//arc(cx, cy, radio, inicioArco (rad), finArco(rad), sentido horario)
ctx.arc(180, 120, 60, 1* Math.PI, Math.PI * 2, true);
ctx.fill();
Ejercicio
Hacer un mini paint.
document.onmousedown = ratonPulsado;
document.onmouseup = ratonLevantado;

function ratonLevantado(){
	document.onmousemove = null;
}
function ratonPulsado(){
	document.onmousemove = ratonSeMueve;
}

function ratonSeMueve(event) {
	var x = event.clientX;
	var y = event.clientY;
	ctx.beginPath();
	...
	ctx.closePath();
}
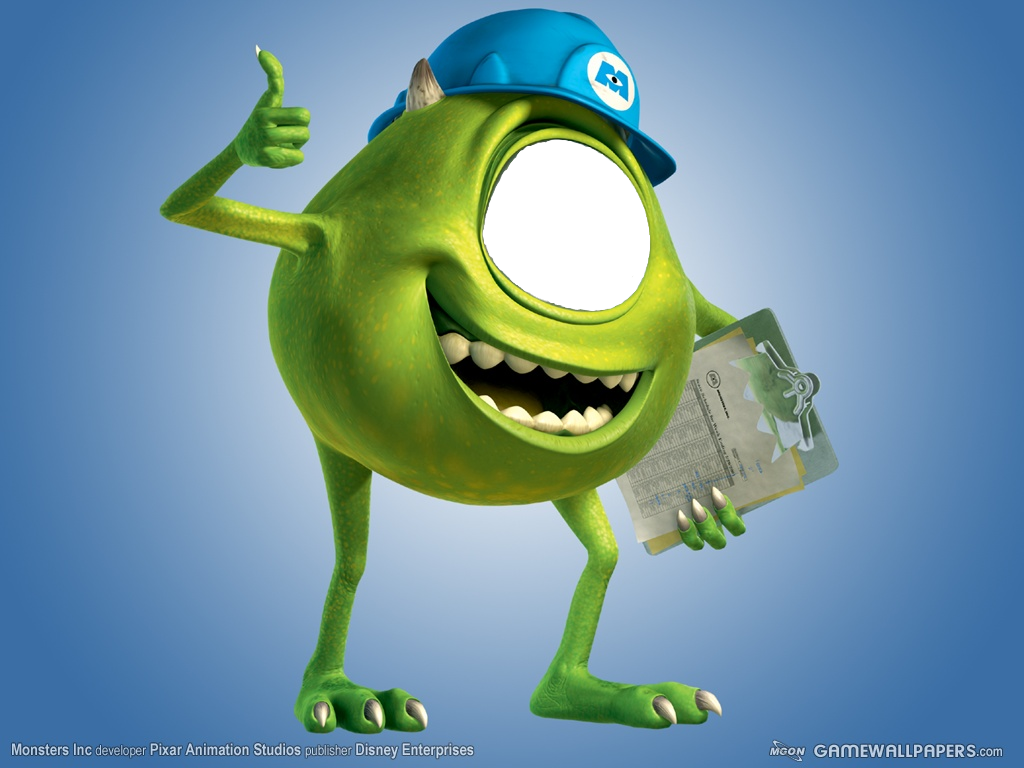
Hacer la página del enlace
Recursos


Código HTML necesario:
<div style="background:url(images/monstruo.png); width:1024px; height:768px;position:absolute; z-index: 10"></div>
<div style="background:url(images/cornea.png);margin-left:470px; margin-top:130px;width:182px; height:192px; position:absolute; z-index: 3"></div>
<canvas id="canvas" width="400px" height="400px" style="position:absolute;z-index:6;  margin-left:350px; border: solid black 2px"></canvas>
line
ctx.moveTo(50, 50);
ctx.lineTo(150, 150);
ctx.lineTo(150, 250);
ctx.lineWidth = 10;
ctx.strokeStyle = "#ff0000";
ctx.lineCap = "round"; //tres valores: butt, round, or square
ctx.stroke();
text
ctx.font = "40pt Calibri";
ctx.fillStyle = "#0000ff"; // text color
ctx.fillText("Hello World!", 50, 100);
ctx.lineWidth = 3;
ctx.strokeStyle = "green";
//start, end, left, center, or right. left es el valor por defecto
//left equivale a start
//right equivale a end
ctx.textAlign = "center";
ctx.textBaseline = "middle";
ctx.strokeText("Hello World!", 50, 100);
text, metrics
var text = "Hello World!";
ctx.font = "30pt Calibri";
ctx.textAlign = "start";
ctx.fillStyle = "blue";
ctx.fillText(text, 50, 50);
// get text metrics
var metrics = ctx.measureText(text);
var width = metrics.width;
alert(width);
image
var imageObj = new Image();
imageObj.src = "logo.png";

imageObj.onload = function() {
	//VARIAS FORMAS DE INSERCION:

	//Poner la imagen:
	//(objetoImagen, posicion x, posicion y)
	ctx.drawImage(imageObj, 0, 0);

	//Poner la imagen redimensionando:
	//(objetoImagen, posicion x, posicion y, ancho, alto)
	ctx.drawImage(imageObj, 300, 0, 50, 50);

	//Poner la imagen redimensionando y recortando:
	//ctx.drawImage(imageObj, sourceX, sourceY, sourceWidth, sourceHeight, destX, destY, 			destWidth, destHeight);
	ctx.drawImage(imageObj, 100, 100, 180, 180,200,200, 200,200)
};
shadow
ctx.shadowColor = "#000000";
ctx.shadowOffsetX = 10;
ctx.shadowOffsetY = 10;
ctx.shadowBlur = 10;

ctx.fillStyle = "rgba(0,0,255,1)";
ctx.fillRect(20,20,200,100);
gradient
var c = document.getElementById("canvas");
var ctx = c.getContext("2d");
//coordenadas del punto inicial y final del degradado
var grd = ctx.createLinearGradient(0, 0, 400, 400);
grd.addColorStop(0, "pink");
grd.addColorStop(0.5, "red");
grd.addColorStop(1, "blue");
ctx.fillStyle = grd;
ctx.fillRect(0,0,400,400);
Convertir un SVG a código del Canvas de HTML5
http://www.professorcloud.com/svg-to-canvas/
Animaciones con el Canvas de JavaScript
Simple Animation con setInterval
Mejor rendimiento con requestAnimationFrame
var c = document.getElementById("canvas");
var ctx = c.getContext("2d");
var posX = 100;

requestAnimationFrame(pintaCuadrado)
function pintaCuadrado(){
	ctx.save();
	ctx.clearRect(0,0,ctx.canvas.width,ctx.canvas.height);
	ctx.restore();
	posX = posX + 5;
	ctx.beginPath();
	ctx.rect(posX,0,200,200);
	ctx.fill();
	ctx.closePath();
	requestAnimationFrame(pintaCuadrado)
}
Estructura correcta del bucle infinito para hacer un videojuego
var c = document.getElementById("canvas");
var ctx = c.getContext("2d");

var x = 10;
var y = 10;
var w = 20;
var h = 30;
var speed = 2;

var update = function(){
	x +=speed;
}
var draw = function(){
	ctx.clearRect(0,0,300,300);
	ctx.fillStyle = "rgb(200, 0, 100)";
	ctx.fillRect(x, y, w, h);
}
var step = function(){
	update();
	draw();
	window.requestAnimationFrame(step);
};

step();
Ejercicio
Siguiendo la estructura propuesta en el ejemplo anterior, dibujar un rectángulo que cuando llegue al final de la pantalla dé media vuelta.Ver ejemplo resuelto.
Ejercicio
Utilizar el siguiente array de enemigos en lugar de uno solo.
var enemies = [
	{
    	x: 100, //x coordinate
    	y: 100, //y coordinate
    	speedY: 1, //speed in Y
    	w: 40, //width
    	h: 40 //heght
    },
    {
        x: 260,
        y: 100,
        speedY: 2,
        w: 40,
        h: 40
    },
    {
        x: 380,
        y: 100,
        speedY: 3,
        w: 40,
        h: 40
    },
    {
        x: 450,
        y: 100,
        speedY: 7,
        w: 40,
        h: 40
    }
];
Ejercicio
Utilizando el siguiente código, dibujar un jugador en escena, de tal forma que cuando mantengamos pulsado el ratón sobre el canvas, el jugador avance, y si dejamos de pulsar, el jugador se quede quieto
canvas.addEventListener('mousedown', function(){
  player.isMoving = true;
});
canvas.addEventListener('mouseup', function(){
  player.isMoving = false;
});
Ejercicio
Retocar el código anterior utilizando el siguiente código para que responda correctamente a los eventos del móvil
canvas.addEventListener('mousedown', movePlayer);
canvas.addEventListener('mouseup', stopPlayer);

canvas.addEventListener('touchstart', movePlayer);
canvas.addEventListener('touchend', stopPlayer);
Gestionando colisiones
Implementar el siguiente código para gestionar colisiones
var checkCollision = function(rect1, rect2){
	var closeOnWidth = Math.abs(rect1.x -rect2.x)<=Math.max(rect1.w, rect2.w);
	var closeOnHeight = Math.abs(rect1.y - rect2.y)<=Math.max(rect1.h, rect2.h);
	return closeOnHeight && closeOnWidth;
}
...

if(checkCollision(player, enemies[i])){
	gameLive = false;
	alert("Game Over");
}
Ejercicio – llegar al tesoro
Ejercicio – Añadimos el uso de sprites
Habrá que utilizar el siguiente código:
var sprites = {};
...
var load = function(){
  sprites.player = new Image();
  sprites.player.src = "images/hero.png";

  sprites.background = new Image();
  sprites.background.src = "images/floor.png";

  sprites.enemy = new Image();
  sprites.enemy.src = "images/enemy.png";

  sprites.tesoro = new Image();
  sprites.tesoro.src = "images/chest.png";

}
...
var draw = function(){
	ctx.clearRect(0,0,400,400);

    ctx.fillRect(player.x, player.y, player.w, player.h);
    ctx.fillRect(tesoro.x, tesoro.y, tesoro.w, tesoro.h);

    ctx.drawImage(sprites.background, 0, 0);
    ctx.drawImage(sprites.player, player.x, player.y);

    enemies.forEach(function(element, index){
    	ctx.drawImage(sprites.enemy, element.x, element.y);
    });
    ctx.drawImage(sprites.tesoro, tesoro.x, tesoro.y);
}
...
load();
step();